

Wow, what an amazing product to work with!! I have used Dusty Attic's Chipboards before but had never used any of their other products such as the Advent Calendar. Everything slotted perfectly into place which made gluing it together so easy - loved it!

After choosing the colour scheme / products you are going to use..... See below for list of products I have used here...

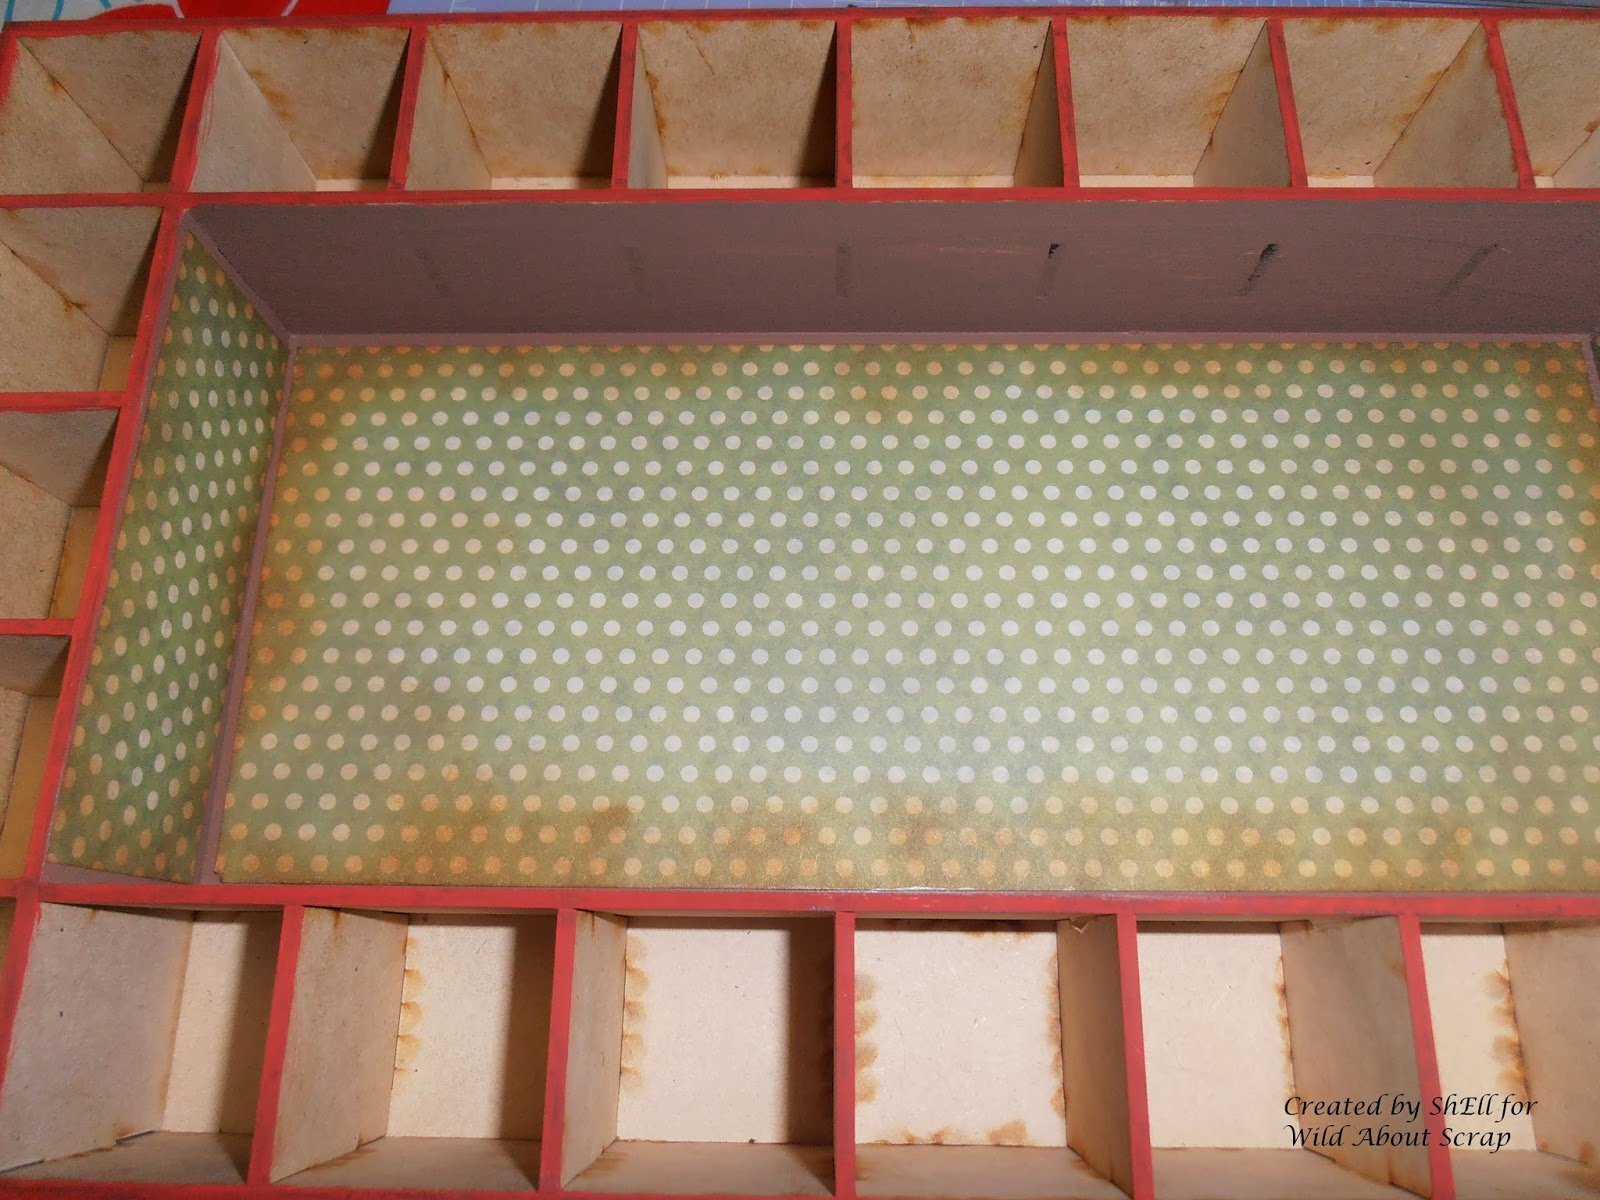
The first thing to do is to assemble the Advent Calendar as per the included instructions (which were really clear and easy to follow) - be sure to have all of your 'tabbed' pieces facing the same way. I then painted the outside edges of the calendar using the Red paint dabber - across the top and down the sides - to get into the edges of the corners I removed the Paint dabbers lid and used a paint brush as the applicator would not reach everywhere I needed it to. I then measured and cut the 7 Gypsies Paper to size to fit the top and sides and applied using mod podge - any multi medium would work nicely though.


Next I made the drawers - can you tell I had lots of fun making these??
Once again easy to follow instructions .....
.JPG)
.JPG)


 At this stage I thought I was finished but then decided it still needed something !?! So I painted and added the Kaisercraft's chipboard word "Peace" in the left hand corner and added Tim Holtz Mirror Stars to the drawer fronts and on to the top.
Now it is finished!!
Now I need to choose what little goodies I will place into each drawer... :)
I hope you like it and that I have inspired you to create your own Dusty Attic Advent Calendar!!

After choosing the colour scheme / products you are going to use..... See below for list of products I have used here...

The first thing to do is to assemble the Advent Calendar as per the included instructions (which were really clear and easy to follow) - be sure to have all of your 'tabbed' pieces facing the same way. I then painted the outside edges of the calendar using the Red paint dabber - across the top and down the sides - to get into the edges of the corners I removed the Paint dabbers lid and used a paint brush as the applicator would not reach everywhere I needed it to. I then measured and cut the 7 Gypsies Paper to size to fit the top and sides and applied using mod podge - any multi medium would work nicely though.
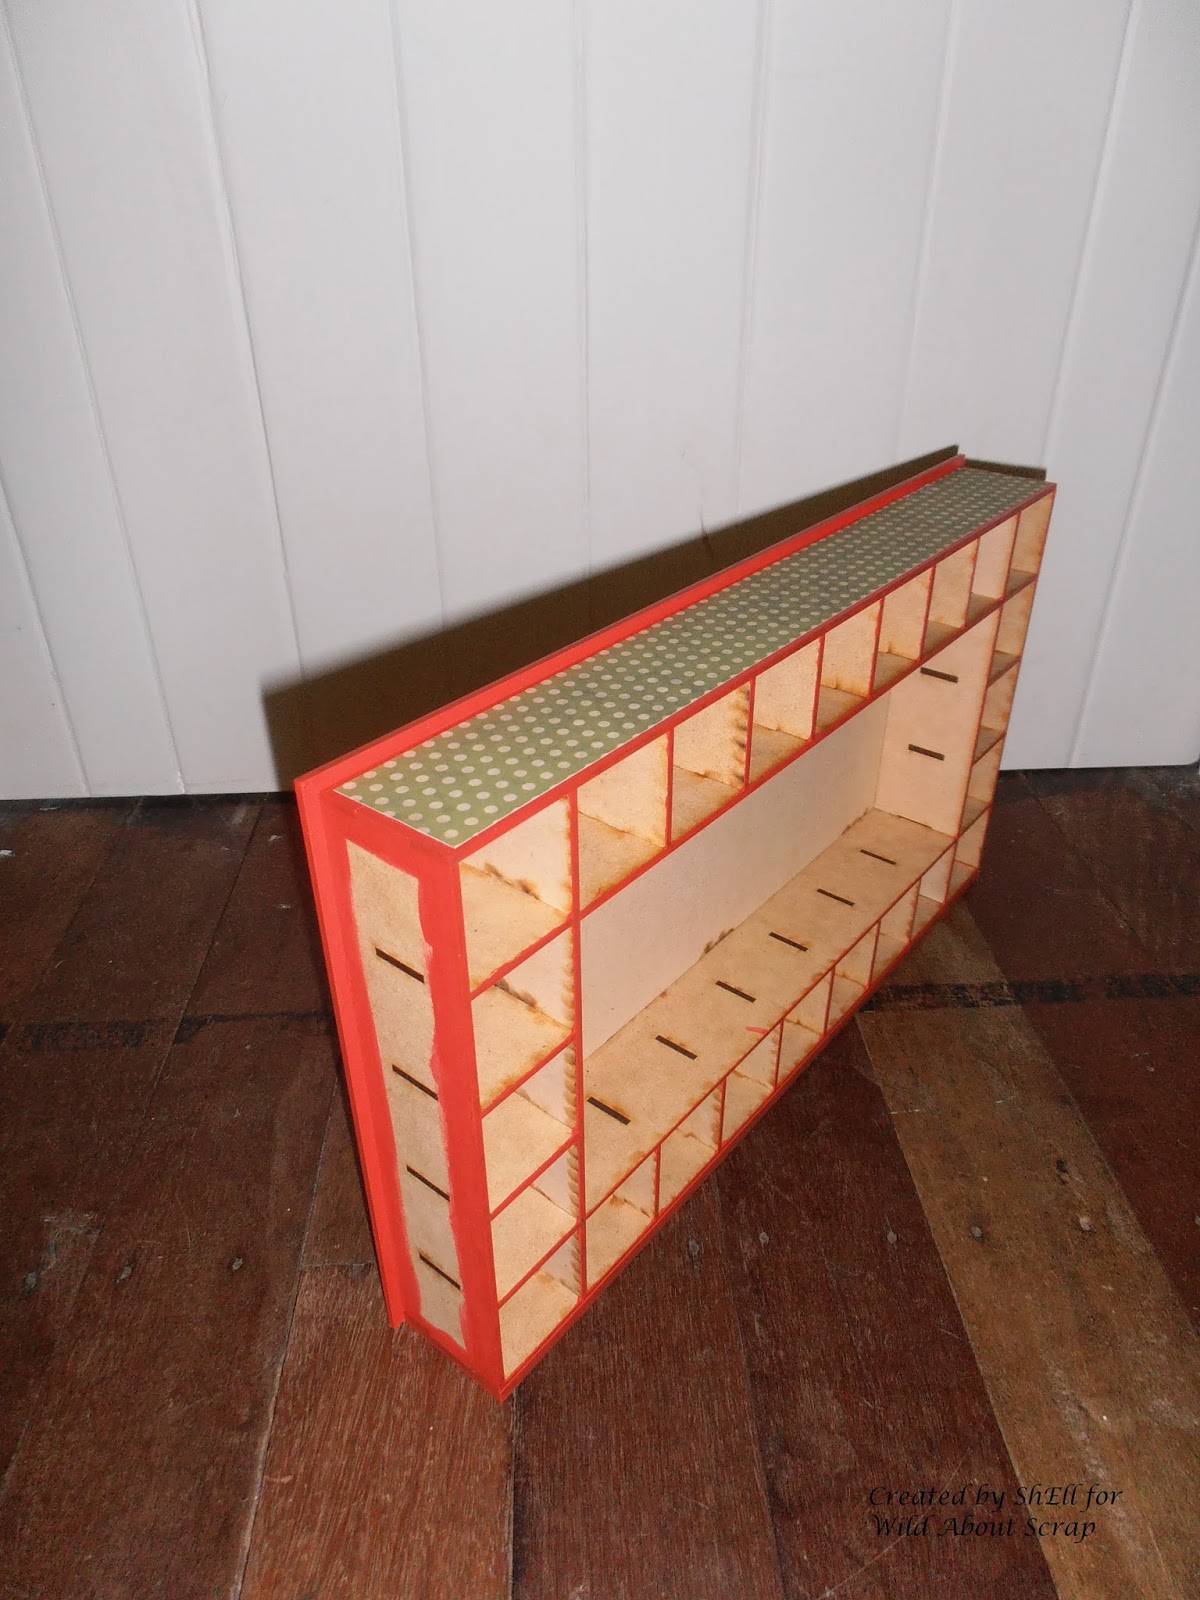
I then painted the inside of the Advent calendar using Sable Brown paint by Claudine Hellmuth - this is the first time I have used any of the Studio paints - great to work with - glides on easily - it was like liquid chocolate!! I then measured the 7 Gypsies paper to fit the inside back and sides - I had painted the inside top and left this part un-papered. I used my Ink Applicator Blending Tool to apply Vintage Photo Distress Ink to the edges of the paper. I adhered this with mod podge also.
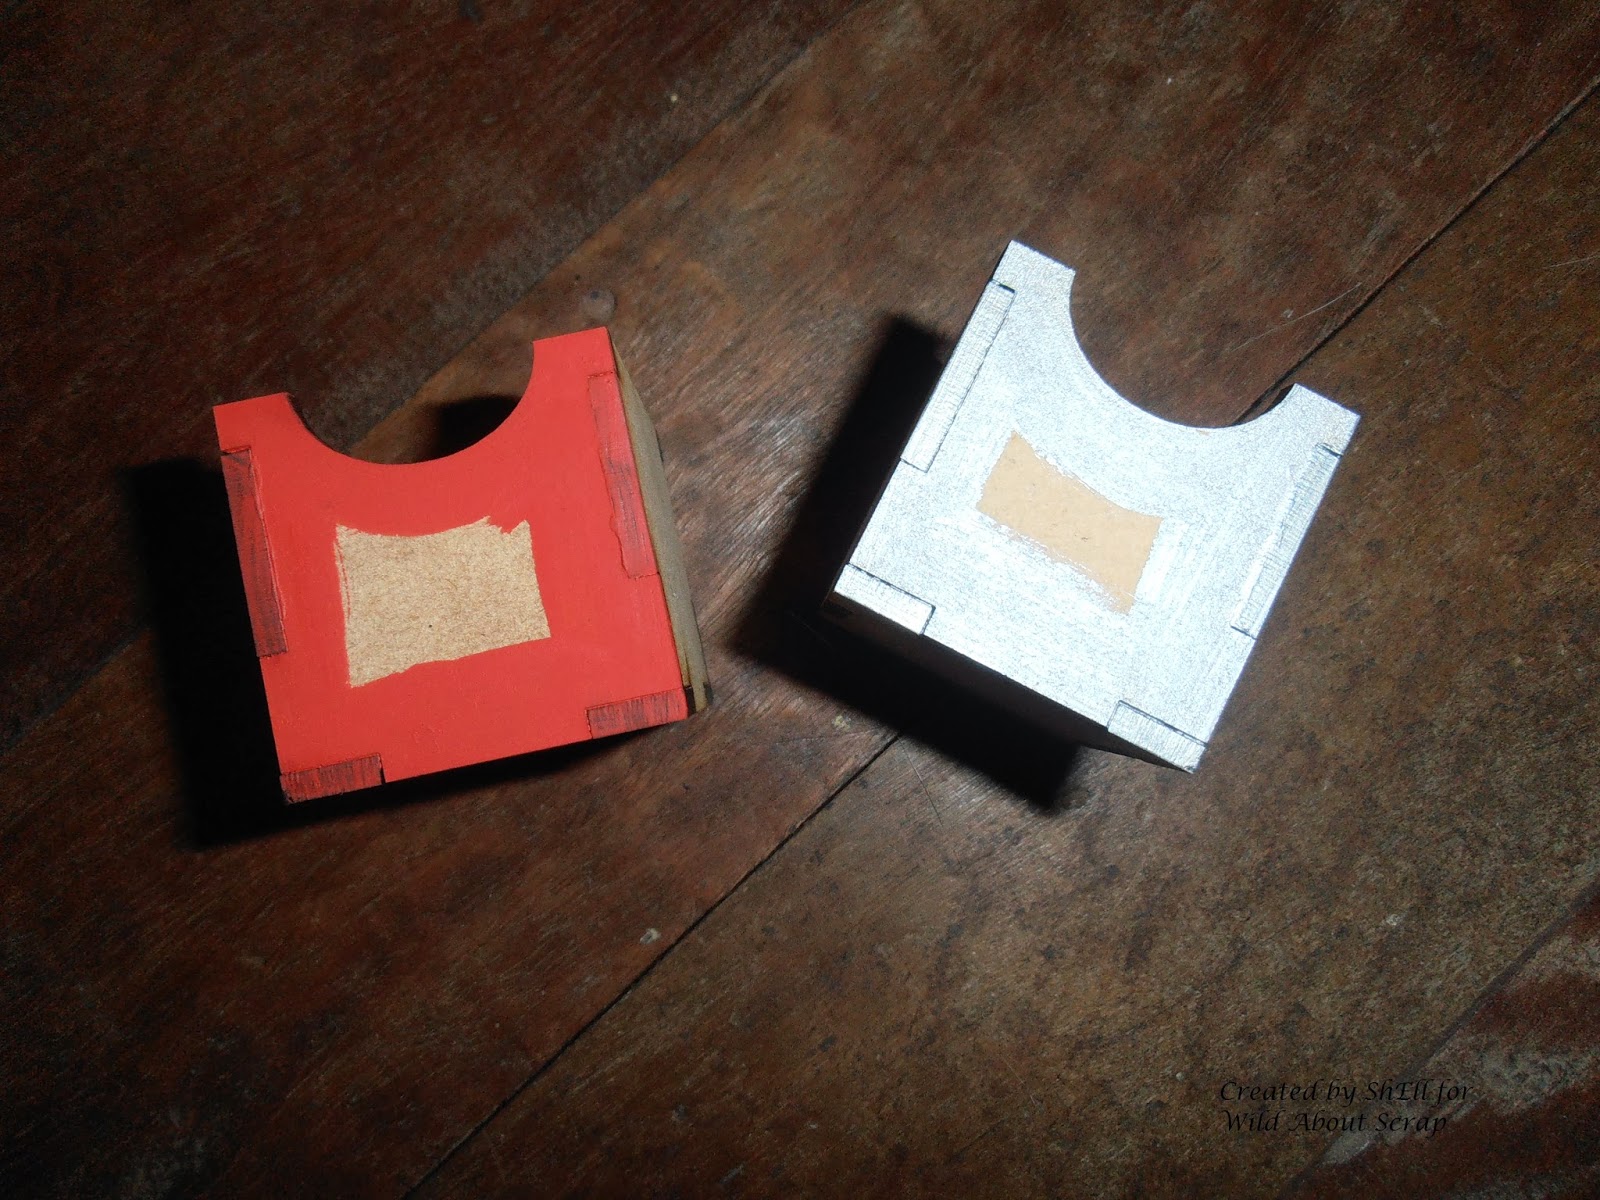
Next I made the drawers - can you tell I had lots of fun making these??
Once again easy to follow instructions .....
They were so cute I could not resist playing around with them!!!
.JPG)
.JPG)
I chose the papers for the drawer fronts and used a Spellbinders die to cut the squares to fit and used a circle punch to cut the half circle for the top. I then applied these to the drawers after painting the edges with the red and the silver paints. After the mod podge was dry I very lightly paint dabbed the edges of the drawer paper fronts.

Next I paper pieced the clothing for Mary, Joseph, the Shepherd and the Three Kings. I painted the animals, the Manger and Baby Jesus in His Crib. I also carefully painted Crowns, beards and scarves. When the paint on these was dry I then coated all of the people with Glossy Accents - I lightly sprinkled glitter on the Three Kings while the Glossy Accents was still wet. I also glossy accented and sprinkled glitter on the Star to give it some sparkle!!

Assemble your Nativity Scene when everything is dry.

Next the Angel - I paper pieced her dress and added Picket Fence Stickles to make her dress sparkly to suit her golden wings!

Onto the numbers for the drawers - these came included in the Advent Calendar Kit...

I painted them using the Red and Silver paint Dabbers, applied glossy accents and glitter.

Next step is to assemble it all together......

Now it is finished!!
Products used (all are available from Wild About Scrap) :
- Dusty Attic Advent Calendar
- Dusty Attic Nativity Scene Advent Insert
- 2 sheets - 7 Gypsies Santa's Journey Collection - Gypsy Christmas 12x12 paper
- Echo Park - 'tis the Season 6x6 paper pad
- Glossy Accents
- Claudine Hellmuth Studio Paint - Sable Brown
- Paint Dabbers - Red Pepper and Silver
- Kaisercraft Angel
- Kaisercraft Peace
- Tim Holtz Mirror Stars
From my own stash I used:
- Super Tac Glue
- Mod Podge, Black
- White and Gold Paints
- Picket Fence Stickles
- Red and clear/silver rhinestones
- glitter, ink applicator tool
- paintbrush
- Vintage Photo distress ink
... all of which are also available at Wild About Scrap.
Now I need to choose what little goodies I will place into each drawer... :)
I hope you like it and that I have inspired you to create your own Dusty Attic Advent Calendar!!
Shell
xox
That looks awesome & you make it look so easy. x
ReplyDeleteThanks Elaine, I really enjoyed making the advent calendar - and when you are working with great products..... it makes it so much easier! Thank you for your comment! Shell xox
ReplyDelete